Fishing Lure Kits Make Your Own | Build Custom Lures Step-by-Step
Fishing is more than just a hobby; it’s an art form that requires patience, creativity, and skill. While most anglers rely on store-bought lures, making your own custom fishing lures can be both rewarding and cost-effective. With modern fishing lure kits, anyone can design and build lures tailored to their target species and fishing conditions.
In this guide, you’ll learn everything you need to know about fishing lure kits and how to make your own lures step-by-step. Whether you’re a beginner or an experienced angler, building your own lures adds a personal touch to every catch.
Why Make Your Own Fishing Lures
Building your own fishing lures gives you complete control over color, shape, and weight, allowing you to match the exact preferences of the fish you want to catch. Handmade lures can also mimic natural prey more effectively than mass-produced ones.
Another reason anglers make their own lures is for the satisfaction it brings. When you catch a fish using a lure you built from scratch, it adds an extra layer of pride and excitement to the experience. Plus, DIY lure-making can save money over time and give you a deeper understanding of what attracts fish.
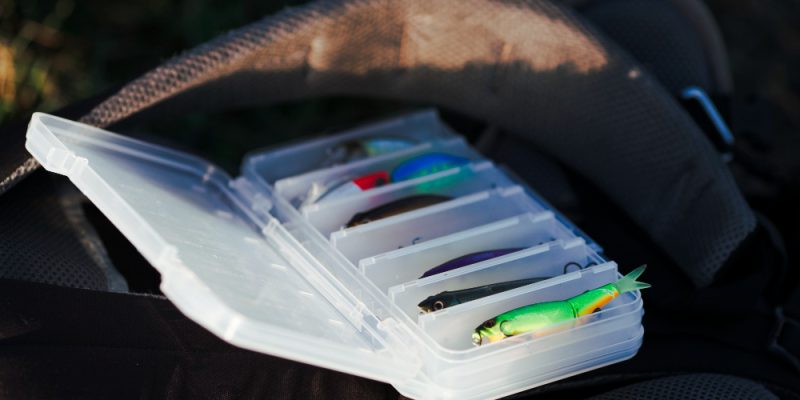
What Comes in a Fishing Lure Kit
A typical fishing lure kit includes all the materials you need to start building. While kits vary, most contain blank lure bodies, hooks, split rings, paint, eyes, and protective coating. Some advanced kits even include airbrush paints, molds, or soft plastic components for creating different lure types.
Beginners usually start with a simple hard bait kit, which includes unpainted crankbait bodies. These are easy to work with and can be customized in countless ways. For those who prefer soft baits, silicone molds and plastic resin kits allow you to create lifelike worms, minnows, and grubs.
Tools You’ll Need to Get Started
Along with the items included in your kit, a few extra tools can make the lure-building process smoother. You’ll need pliers for attaching hooks and split rings, small brushes or an airbrush for painting, and a clean workspace with proper ventilation for applying sealants or epoxy coatings.
Some anglers also use sandpaper to smooth out rough edges and small drills to add holes for rattles or extra weight. If you want to get creative, keep extra colors of paint and glitter on hand for added flair.
Step One – Planning Your Design
Before you start building, think about what kind of fish you’re targeting. Different species respond to different colors, shapes, and movements. For example, bass often go after bright, reflective lures, while trout prefer more natural tones.
Sketch your lure design on paper or visualize it before painting. Decide on a base color and accent patterns, such as stripes or dots. You can also look at professional lures for inspiration but don’t be afraid to experiment with your own ideas.
Step Two – Assembling the Lure
Once you have your design ready, begin assembling the basic components of the lure. Attach the hooks using split rings and pliers, ensuring they are secure but still free to move. If you’re using a hard bait body, check that all joints or hinges move smoothly before painting.
For soft plastic lures, pour the liquid resin into molds and let it cure completely. Once set, remove the lure carefully to avoid tearing. Trim any excess material with scissors or a craft knife.
Step Three – Painting and Decorating
Painting is the most creative part of lure-making. Start with a primer coat to ensure the paint adheres evenly. Once dry, apply your base color using a brush or airbrush. Add layers for shading, details, and patterns that imitate baitfish or insects.
If you want to add extra realism, glue on small 3D eyes or use metallic paints for shine. After painting, let the lure dry thoroughly before applying a clear coat or epoxy finish. This protective layer not only enhances appearance but also shields the paint from water damage.
Step Four – Adding Weight and Finishing Touches
Adding weight to your lure helps control how it moves through the water. Some fishing lure kits include small lead weights or adjustable inserts. The placement of weight affects the lure’s balance, diving depth, and wobble.
If you’re making topwater lures, keep them lightweight so they float properly. For deeper water fishing, add more weight to ensure the lure sinks effectively. Test the balance by placing the lure in a bowl of water before your first fishing trip.
Once satisfied, inspect the lure for sharp edges or rough spots. A quick sanding or additional coat of epoxy will give it a professional look.
Step Five – Testing Your Lure
The real test comes when you cast your homemade lure into the water. Start in a calm area where you can clearly observe how it moves. Adjust your retrieve speed and rod motion to see how the lure reacts.
If the lure doesn’t swim correctly or sinks too fast, make small adjustments by removing or adding weight. Sometimes even a minor tweak can change how fish respond to it. Don’t be discouraged if your first few attempts aren’t perfect—trial and error is part of the process.
Benefits of Building Custom Lures
Making your own lures offers several advantages beyond customization. You can replicate effective designs when store-bought versions are unavailable or too expensive. It’s also a great way to learn more about fish behavior, water conditions, and bait presentation.
DIY lure-building can become a hobby on its own. Many anglers find it relaxing to paint and design lures, turning fishing preparation into a creative outlet. Over time, you’ll develop unique designs that catch more fish and reflect your personal style.
Safety and Maintenance Tips
When working with paints, glues, or resin, always ensure proper ventilation and use gloves if necessary. Keep sharp tools like hooks and pliers away from children and store them safely.
After fishing, rinse your handmade lures with fresh water to remove dirt and salt. Dry them completely before storing to prevent rust or corrosion. With proper care, your custom-made lures can last as long as commercial ones—sometimes even longer.
Conclusion
Building your own fishing lures with a DIY fishing lure kit is a rewarding experience that combines creativity with practical skill. By following these step-by-step instructions, you can design unique lures that match your fishing style and local waters. Each custom lure you create brings a sense of pride, especially when it helps you land that perfect catch.
Whether you fish for sport or relaxation, making your own lures deepens your connection with the craft. With practice, patience, and imagination, your tackle box will soon be filled with personalized creations that no store can match.
FAQs
1. What do I need to start making my own fishing lures?
You’ll need a fishing lure kit that includes lure bodies, hooks, rings, paint, and a sealant. A few extra tools like pliers, brushes, and sandpaper will also help.
2. Are DIY lure kits suitable for beginners?
Yes, most fishing lure kits are beginner-friendly and come with clear instructions. Start with simple hard bait kits before moving on to more complex designs.
3. How long does it take to make one fishing lure?
Depending on the design and drying times, a single lure can take anywhere from a few hours to a full day to complete.
4. Can I use homemade lures for all types of fish?
Absolutely. You can make lures for freshwater or saltwater species. Adjust size, color, and weight based on your target fish.
5. How can I make my custom lures last longer?
Use quality paints, apply multiple coats of sealant, and store lures in a dry tackle box after each use. Cleaning them after fishing also prevents rust and wear.
Also read: Review Large Attachments iPhone: Step-by-Step Instructions