Cheese Onion Pasties: 10 Easy Steps to Master Homemade Perfection
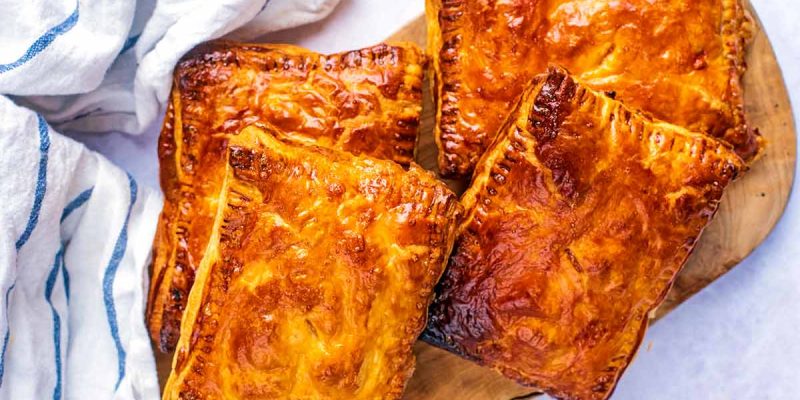
Cheese onion pasties are a quintessential comfort food, offering a delightful blend of savoury cheese and sweet, caramelised onions wrapped in a crisp, golden pastry. These hand-held treats are perfect for any occasion, from casual snacks to elegant appetisers. Mastering the art of making cheese onion pasties at home can seem like a daunting task, but with the right techniques, you can create delicious, bakery-quality pasties right in your own kitchen. In this guide, we’ll walk you through ten easy steps to achieve homemade perfection with your cheese onion pasties.
Cheese Onion Pasties: Select the Best Ingredients for Ultimate Flavor
The foundation of any great cheese onion pasties starts with high-quality ingredients. Choose sharp cheddar cheese for a rich, tangy flavour, and opt for a good melting cheese like mozzarella for a gooey texture. For the onions, yellow or red onions work well. Ensure you have fresh, flaky pastry dough—store-bought puff pastry is a convenient option, but homemade shortcrust pastry can add a personal touch.
Cheese Onion Pasties: Prepare Your Onions Perfectly
Start by finely chopping your onions to ensure even cooking and flavour distribution. Sauté the onions in a pan with a bit of butter or oil over medium heat. Cook them slowly, stirring frequently, until they become soft and caramelised, about 15-20 minutes. Caramelising the onions enhances their natural sweetness, making your pasties even more delicious.
Cheese Onion Pasties: Choose the Right Pastry Dough for Perfection
For cheese onion pasties, the choice of pastry dough can greatly impact the final product. Puff pastry creates a light, flaky texture, while shortcrust pastry offers a crumbly, buttery bite. If using puff pastry, roll it out on a lightly floured surface to your desired thickness. For shortcrust pastry, ensure it is chilled before rolling to prevent it from becoming too soft.
Cheese Onion Pasties: Grate and Mix Your Cheese for Best Results
To achieve the best melt and flavour, grate your cheese rather than using pre-shredded varieties. Grated cheese melts more evenly and incorporates better with the onions. Mix your grated cheese with the caramelised onions, adding a pinch of salt and pepper to taste. For an extra touch, consider adding herbs like thyme or chives to the mixture.
Cut and Shape Your Pastry
Roll out your pastry dough and cut it into evenly sized squares or circles, depending on your preference. For a classic pasty shape, cut circles about 4-5 inches in diameter. Place a generous spoonful of the cheese and onion mixture in the centre of each pastry circle. Be careful not to overfill, as this can cause the pasties to leak during baking.
Seal and Crimp the Edges
To seal your pasties, fold the pastry over the filling to create a half-moon shape. Press the edges together to seal, and then crimp the edges with a fork to ensure they are well-closed. This step not only secures the filling but also adds a decorative touch to your pasties.
Apply an Egg Wash for a Golden Finish
An egg wash is essential for achieving a beautiful golden-brown finish on your cheese onion pasties. Beat an egg with a splash of water or milk, and brush the mixture over the tops of your pasties before baking. This step enhances the colour and adds a slight sheen to your pastries.
Preheat Your Oven for Even Baking
Preheating your oven to 375°F (190°C) ensures that your cheese onion pasties bake evenly and achieve a crisp, golden exterior. Place the pasties on a baking sheet lined with parchment paper to prevent sticking. Bake for 20-25 minutes or until the pasties are golden brown and the cheese is bubbling.
Let Your Pasties Cool Before Serving
Allow the cheese onion pasties to cool on a wire rack for a few minutes after baking. This helps the pastry set and prevents the filling from being too hot when you bite into it. Serving them slightly warm enhances the flavours and makes them even more enjoyable.
Store and Reheat Your Cheese Onion Pasties
If you have leftovers or want to prepare your pasties in advance, store them in an airtight container at room temperature for up to 2 days. For longer storage, you can freeze them. To reheat, place them in a preheated oven at 350°F (175°C) for about 10 minutes to restore their crispiness.
Conclusion
Mastering the art of cheese onion pasties at home involves attention to detail and a few key techniques. From selecting high-quality ingredients and perfecting the caramelization of onions to ensuring a crisp pastry and golden finish, each step plays a crucial role in achieving homemade perfection. By following these ten easy steps, you’ll be able to create delicious, bakery-quality cheese onion pasties that are sure to impress family and friends. Whether enjoyed as a snack, appetiser, or part of a meal, these pasties are a delightful treat that’s well worth the effort.
FAQs
1. Can I use store-bought pastry for cheese onion pasties?
Yes, store-bought puff pastry or shortcrust pastry is a convenient and excellent option for making cheese onion pasties. It saves time and still produces delicious results.
2. How do I ensure the filling doesn’t leak during baking?
Avoid overfilling and make sure the edges of the pastry are well-sealed. Crimping the edges with a fork also helps to prevent leakage.
3. Can I prepare these snacks in advance?
Yes, you can assemble and freeze them before baking. Just bake from frozen, adding a few extra minutes to the cooking time.
4. What are some dairy-free alternatives for the filling?
Use plant-based cheese substitutes, which are available in various flavours and textures that melt well and work as a great replacement.
5. How can I add some heat to the filling?
Incorporate ingredients like diced jalapeños, red pepper flakes, or a splash of hot sauce to spice up the filling according to your taste preference.
Also read: GLOUCESTERSHIRE HIGHWAYS ROAD CLOSURES: 10 ESSENTIAL ALERTS FOR A HASSLE-FREE COMMUTE